
How to Find the Best Natural Light for Flat-Lays - Part 1
One of the most impactful aspects of capturing beautiful flat-lay images is finding the right lighting. This can be difficult, especially in an unfamiliar or challenging environment - so how do you make sure you get it just right? In this blog post series we will explore tips and insights on how to find the best lighting for your flat-lay photos, so you can create stunning visuals every single time and ensure your flat-lays don't fall flat. ;)
Each post of this series will help you understand where to find the best light in a different scenario. We'll start in a room with a single window, which is one of the most common and accessible settings. I'll walk you through 4 different places to set up your flat-lay mat, and, while I always hesitate to set "rules" in art, you will clearly see which place provides the most abundant and even light.
Before we get started, it's helpful to understand lighting angles, if you don't already. To calculate your angle, draw a line from the middle of the window down to your flat-lay mat. And then estimate the degree of the angle you are creating against the horizontal axis where your mat is located. In the example below, I have about a 45 degree angle.

Now let's see how different locations around the room, and the lighting angles created, impact the lighting of a flat-lay.
1. On the ground directly next to a window
This spot in the room is going to yield flat images if the window doesn't go all the way to the floor. That is because the angle of the light is coming straight down - there is no opportunity for highlights and shadow.


2. On the floor, about 6 feet from the window.


3. Now we are up on a table that is about 3 feet from the window.
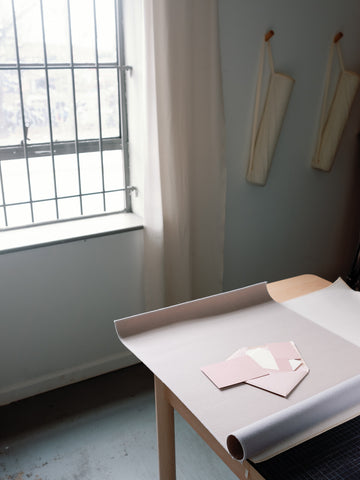

4. Finally, what if we move the table as close as possible to the window.


For easy comparison, here are the results of our 4 locations.

1. On the ground, right under the window; 2. On the ground, about 6 feet away; 3. On a table, 3 feet from the window; 4. On a table, right up against the window
High quality flat-lays are an essential aspect to selling products & services. The differences in lighting may be subtle to some, but discerning clients will notice. Practice finding the best light with our portable styling mats. They are designed to roll out anywhere and help you seamlessly create elevated flat-lay images in any situation. And stay tuned for part 2 where we explore the best location in a different scenario.


